In this blog, we will see how to create a table from UI (Object explorer).
Let's assume that you want to store your friends Name and contact details in a table in Database Test.
Follow the below steps shown in screen shot to create Friends table.
Step 1:
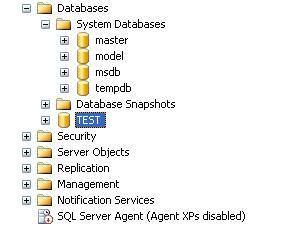
Go to Databases in your server.
Step 2:
Select database where you want to create table.
Here, for sample I selected database with name 'TEST' .
Step 3:
Right Click on Tables :
Click on New Table .
Following screen will be displayed.
Step 4:
Enter column names.
In this scenario one column is required to hold friend name and other column to hold his/her contact number.
Check Allow Nulls Check box only if you want to allow that to accept nulls. That is, select Allow Nulls only if you want to insert data into table without providing value in that particular column.
Step 5:
Save your table after you enter all the required columns in the tables ( As shown in above screen shot).
Select File --> Save .
Else, Select save icon.
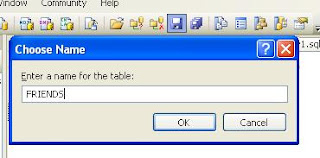
A pop up will be displayed as shown below.

Enter the table Name ( Name with which you want to save your table ).
Here, My table name is "FRIENDS".
After entering the table name, Click OK in the pop up window.
Now, Your Table ( FRIENDS) is created successfully.
Step 6:
Checking whether table is created or not.
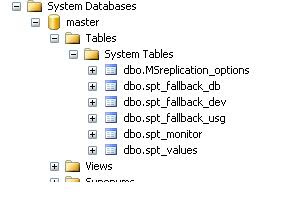
Expand Tables on the object explorer ( left side pan). If table is created ,then you will be able to see the table name in the list.
Expand FRIENDS table , then columns information will be displayed.
Though we can create tables from UI (User Interface ) , its not well used except for simple table creations.
Let's assume that you want to store your friends Name and contact details in a table in Database Test.
Follow the below steps shown in screen shot to create Friends table.
Step 1:
Go to Databases in your server.
Step 2:
Select database where you want to create table.
Here, for sample I selected database with name 'TEST' .
Step 3:
Right Click on Tables :
Click on New Table .
Following screen will be displayed.
Step 4:
Enter column names.
In this scenario one column is required to hold friend name and other column to hold his/her contact number.
Check Allow Nulls Check box only if you want to allow that to accept nulls. That is, select Allow Nulls only if you want to insert data into table without providing value in that particular column.
Step 5:
Save your table after you enter all the required columns in the tables ( As shown in above screen shot).
Select File --> Save .
Else, Select save icon.
A pop up will be displayed as shown below.

Enter the table Name ( Name with which you want to save your table ).
Here, My table name is "FRIENDS".
After entering the table name, Click OK in the pop up window.
Now, Your Table ( FRIENDS) is created successfully.
Step 6:
Checking whether table is created or not.
Expand Tables on the object explorer ( left side pan). If table is created ,then you will be able to see the table name in the list.
Expand FRIENDS table , then columns information will be displayed.
Though we can create tables from UI (User Interface ) , its not well used except for simple table creations.


